

What is Colima?
Colima is Docker for Mac tool built on Lima. Lima is a virtual machine tool for macOS with automatic file sharing and port forwarding. Using Lima feels a lot like using WSL on Windows.
Lima launches Linux virtual machines with automatic file sharing and port forwarding (similar to WSL2), and containerd.
Lima can be considered as a some sort of unofficial “containerd for Mac”.
Colima builds on that foundation to run a VM with Docker installed, and it also configures your local Docker context for you.
Features of Colima
- Free and Open-Source: Colima is freely accessible and open for modification, making it an excellent choice for developers.
- High Performance: Utilizing QEMU, Colima delivers better performance compared to other container runtimes.
- Kubernetes Support: Colima seamlessly integrates with Kubernetes, a powerful tool for managing containerized applications.
- User-Friendly: Colima is easy to install and use, simplifying the containerization process.
- Compatibility: Colima is compatible with all macOS versions, ensuring widespread usability.
Components of Colima
Colima comprises the following components:
- Colima: The core component responsible for initiating and managing the QEMU virtual machine.
- Lima: Lima is a command-line tool for managing QEMU virtual machines.
- Docker: Colima utilizes Docker for running containerized applications.
- Kubernetes: Colima seamlessly integrates with Kubernetes for streamlined management of containerized applications.
Getting Started with Colima
Docker Desktop used to offer essential command line tools like docker and ensured they were regularly updated. As
Docker Desktop is no longer available, we now need to obtain these tools from an alternative source. Let's install
everything using Homebrew.
# Using Homebrewbrew install docker docker-compose kubectl kubectx
Link or relink docker
brew unlink docker && brew link docker
While this provides us with the necessary command line tools, it doesn't set up a functional Docker service. We can confirm this by running the command docker ps.
$ docker psCannot connect to the Docker daemon at unix:///var/run/docker.sock. Is the docker daemon running?
Next to start our Docker service we need to install and start Colima.
$ brew install docker colima$ colima startINFO[0000] starting colimaINFO[0000] creating and starting ... context=vmINFO[0030] provisioning ... context=dockerINFO[0031] restarting VM to complete setup ... context=dockerINFO[0031] stopping ... context=vmINFO[0037] starting ... context=vmINFO[0058] starting ... context=dockerINFO[0063] waiting for startup to complete ... context=dockerINFO[0063] done
That completes the process! Colima has successfully set up Docker within a Lima VM, creating a new docker context and switching to it, allowing us to immediately utilize the docker CLI.
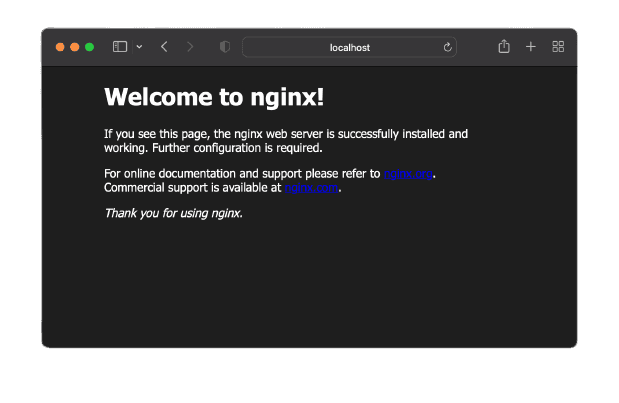
To ensure everything functions as anticipated, let's run an nginx container.
docker run --rm -p 8080:80 nginx
open your web browser to verify its functionality.
Verifying Colima Status
Show the status of Colima.
# Display help information about the colima status command$ colima status --help# Show the status of Colima default instance$ colima status# Show the status of the colima instance associated with profile called `my-profile`$ colima stop --profile my-profile
List all the contexts running
$ colima list
Deleting the context
colima delete
Colima and Kubernetes
In the context of container runtime, Kubernetes can access images that are either built or pulled using Docker.
Similarly, in the case of Containerd runtime, Kubernetes has access to images built or pulled within the k8s.io namespace.
To utilize Kubernetes, kubectl is necessary, and it can be installed using the command brew install kubectl.
To enable Kubernetes functionality in Colima, initiate Colima with the --kubernetes flag.
colima start --kubernetes
In this example we will use kind
brew unlink kind # Unlink it if we already have it installedbrew install kind --HEAD
Now we can create our kind cluster.
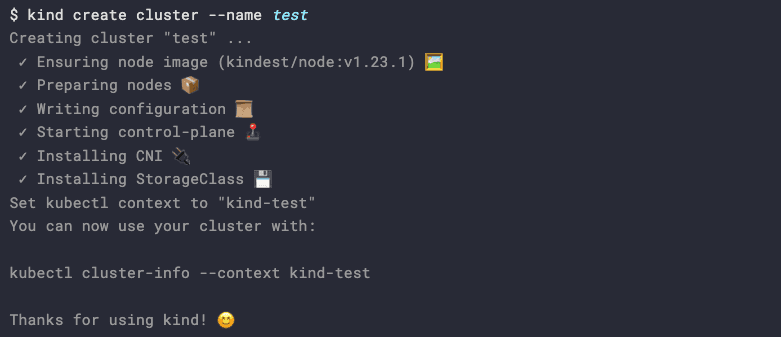
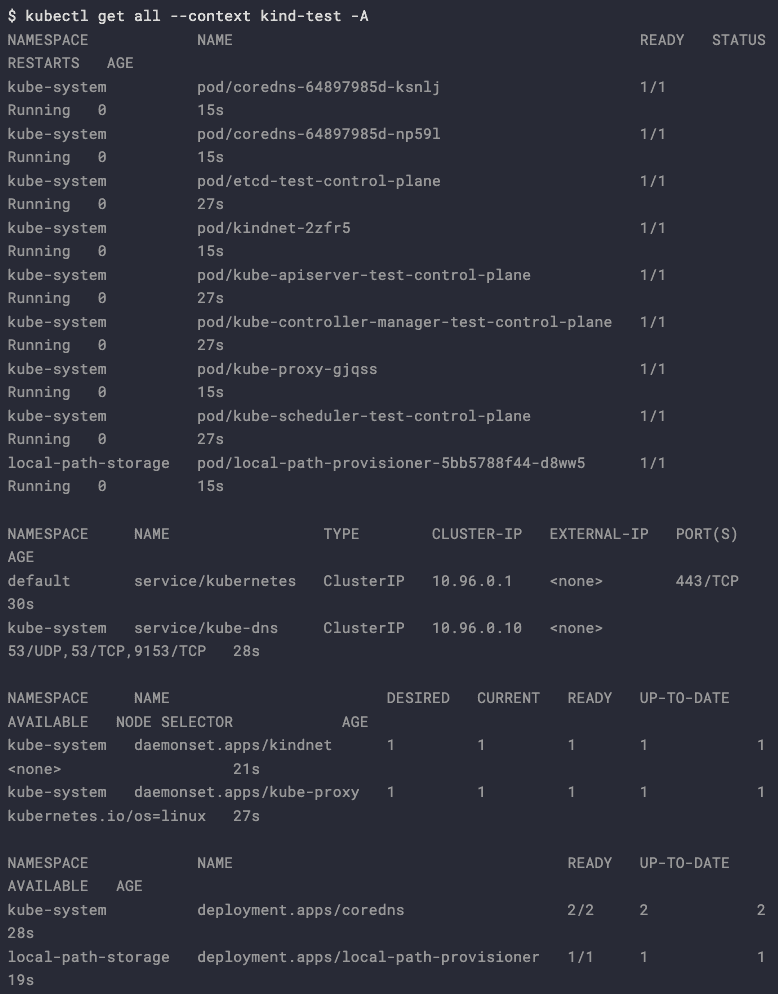
Now we have a kind cluster running in a Docker container inside Colima. Let’s use kubectl to check everything is up and running.
Customizing the VM
The default VM created by Colima comes with 2 CPUs, 2GiB of memory, and 60GiB of storage. You can customize the VM by
either passing additional flags to colima start, such as --cpu, --memory, --disk, or --runtime, or by editing
the config file using colima start --edit.
Note: The disk size cannot be changed after the VM is created. Starting from version 0.5.3, disk size can be increased.
Mounting Volumes
By default, Colima mounts your entire home directory as a read-only volume within the Colima VM, making it easily accessible to Docker. However, Colima is not completely exempt from the performance challenges faced by Docker Desktop. Nevertheless, the read-only option appears to offer acceptable performance.
If, for any specific reason, you require the mounted volumes to be read/write, you can achieve this by specifying the
appropriate settings when starting Colima. Add --mount <path on the host>:<path visible to Docker>[:w] to enable
read/write access. For example:
colima start --mount $HOME/project:/project:w
This command will mount the $HOME/project directory as /project within the Docker container, allowing it to be
writable. However, it's important to note that the capability to mount a directory with read/write permissions is
currently in alpha quality. Due to this, it's strongly advised against mounting critical directories such as your home
directory.
Customization Examples
The default VM may be on a tiny side, especially if you opt to run Kubernetes as well.
Create a VM with
1 CPU,2GiBof memory, and10GiBof storage:$ colima stopINFO[0000] stopping colimaINFO[0000] stopping ... context=dockerINFO[0001] stopping ... context=vmINFO[0005] done$ colima start --cpu 1 --memory 2 --disk 10INFO[0000] stopping colimaINFO[0000] stopping ... context=dockerINFO[0001] stopping ... context=vmINFO[0006] doneINFO[0000] using docker runtimeINFO[0000] starting colimaINFO[0000] starting ... context=vmINFO[0020] provisioning ... context=dockerINFO[0021] starting ... context=dockerINFO[0026] waiting for startup to complete ... context=dockerINFO[0026] doneModify an existing VM to have
4 CPUsand8GiBof memory, and100GiBof storage:$ colima stopINFO[0000] stopping colimaINFO[0000] stopping ... context=dockerINFO[0001] stopping ... context=vmINFO[0005] done$ colima deleteare you sure you want to delete colima and all settings? [y/N] yINFO[0001] deleting colimaINFO[0001] deleting ... context=vmINFO[0001] donecolima start --cpu 4 --memory 8 --disk 100INFO[0000] starting colimaINFO[0000] creating and starting ... context=vmINFO[0030] provisioning ... context=dockerINFO[0031] restarting VM to complete setup ... context=dockerINFO[0031] stopping ... context=vmINFO[0037] starting ... context=vmINFO[0057] starting ... context=dockerINFO[0063] waiting for startup to complete ... context=dockerINFO[0063] done
Wrap up
That's it, Docker Desktop for Mac has been removed and we now have a quick and simple replacement thanks to Colima.
It is worth noting that Colima doesn't auto-start when we turn on our machine so we need to remember to run
colima start after each reboot.
Testcontainers
Configuring Testcontainers with Colima
To run Testcontainers with Colima, follow these steps:
- Create a symbolic link for Colima's
docker.sockfile to the/var/run/docker.sockdirectory using the following command:
sudo ln -sf $HOME/.colima/default/docker.sock /var/run/docker.sock
This command creates a symbolic link between Colima's docker.sock file and the /var/run/docker.sock directory used
by Docker. It might need to be repeated after your machine is rebooted.
This allows Testcontainers to access Colima's Docker environment.
Automating Colima Docker Link on Startup
To prevent the hassle of recreating the symbolic link with each reboot, automate the process by crafting an
initialization script. By adding this script to your ~/.bash_profile or a similar file tailored to your configuration,
the symbolic link will be generated automatically whenever your machine starts up. This eliminates the need for manual
intervention after every reboot.