
Quickstart
A beginner guide to get your first project up and running in production
This guide serves as a quickstart for your first project deployed on our platform. If you have improvement suggestions for this guide, please open an issue at our platform-documentation Gitlab repository.
Target Scenario
Upon completion of this tutorial, you will have your first application deployed in the Kubernetes cluster of your domain. You will also learn how our Platform Auto-Devops Pipeline will take care about building, scanning and deploying your application, as well as creating databases for persistence in AWS.
While this guide will deploy a Go application, the underlying concepts and platform building-blocks will apply to any programming language of your choice.
Pre-Requisistes
As we will deploy our application to AWS, you will have to request access to your domain in AWS. If you have not done so already, please open a Permission Change Request, requesting the following access:
Infrastructure Access: YesArchitectural Domain: [select your domain](see also Domain Overview)
If you want to learn more about access management on our platform, please take a look at the Platform Access documentation.
As soon as the permission change request has been approved, you will receive access to all tools connected to our platform. For this guide the following tools will become relevant and have to be setup in order:
- Aviatrix VPN to access applications hosted in our internal network, e.g. Gitlab (setup instructions will be sent via email, see Platform Access.
- AWS CLI Access via the
aws cliand our Boost CLI (follow our Boost CLI docs for the initial setup)
Once you have your VPN up and running, you should be able to access gitlab.carloop.dev. Additionally, you should be able to access the Kubernetes cluster of your domain from the CLI:
boost auth# You'll be prompted in an interactive modekubectl get pods
To access the int stage of the platform domain as OktaDev role, you would run the following command:
boost auth --domain platform --stage intkubectl get pods
ℹ️ If you experience issues during this initial setup, please reach out to the platform team at
#somebody-to-lovein slack.
Bootstrap our Project
We will use a Platform Backstage Software Template to initialize our project. This will automatically generate all the necessary boilerplate in our repository to get started. As this template is maintained by the platform team, it will setup your project according to best practices.
Head over to backstage, where we will choose the Platform Golang Template to create our project with the following information:
Backstage will automatically create the Gitlab project that will host our application code.
Project Information:
Name: enter your project nameDescription: add some metadataOwner: choose your team name or architectural domain
For example:
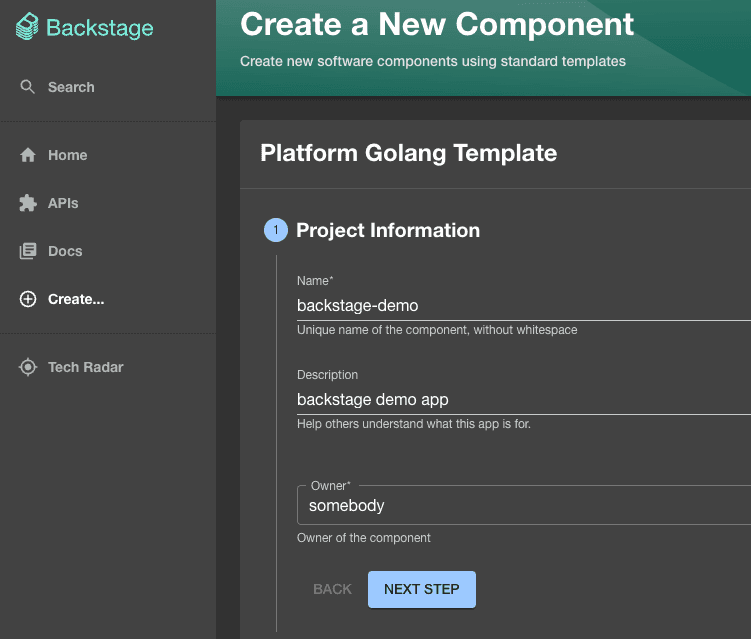
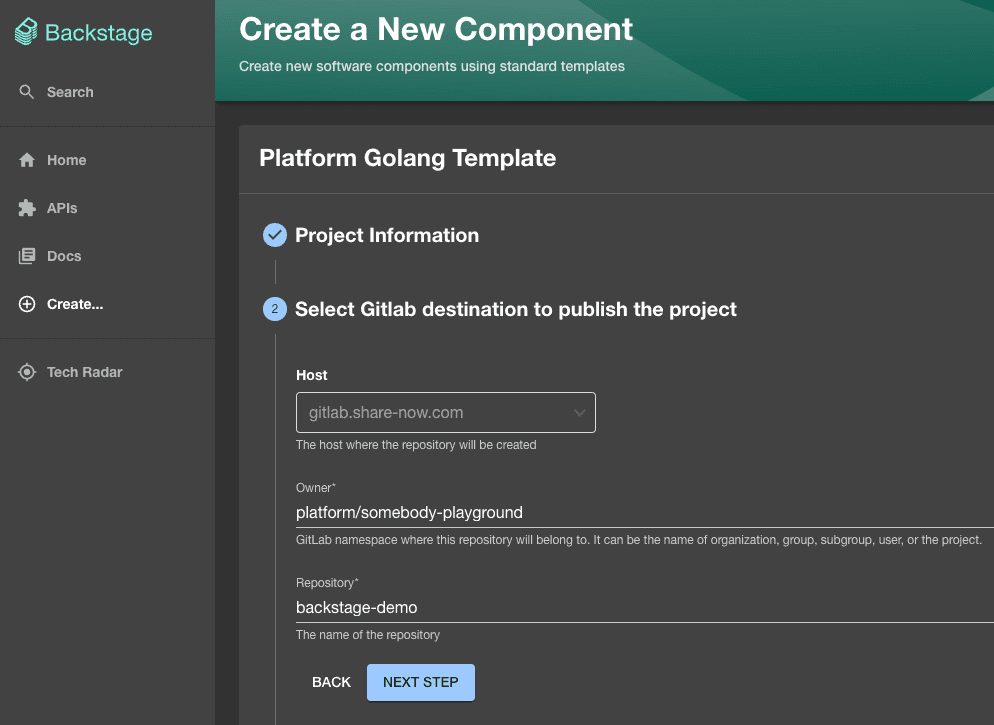
Select Gitlab project to publish the MR:
Owner: Name of the Gitlab Group where you created your Gitlab ProjectRepository: Project Slug of your Gitlab Project
For example:
Infrastructure Configuration:
Architecture Domain: Name of your Architectural Domain
For example:
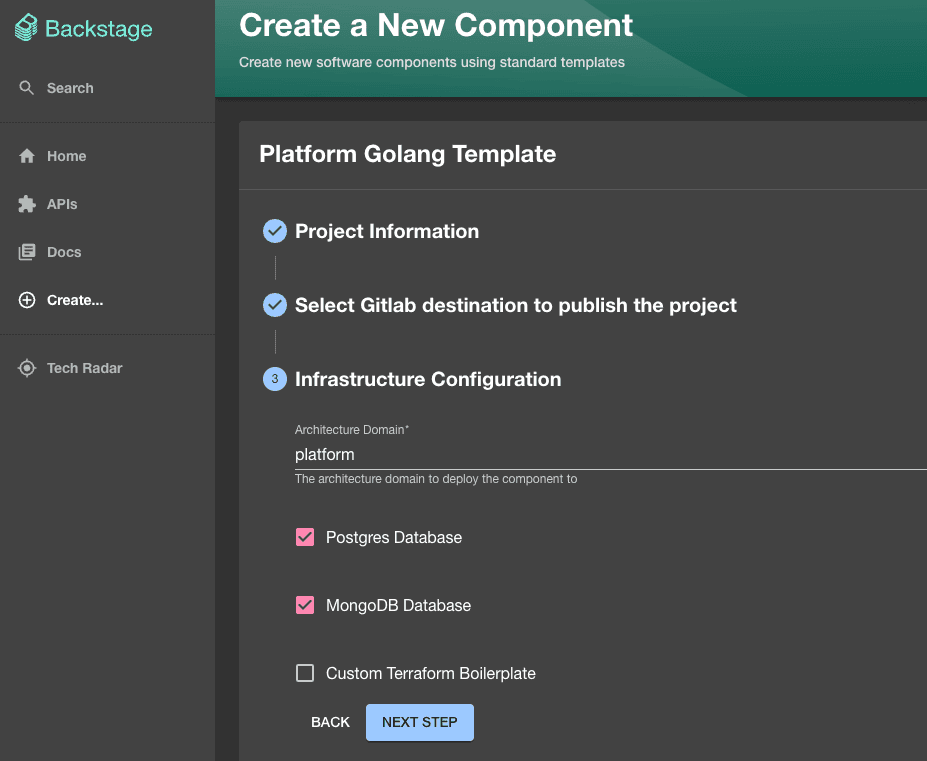
Additionally, select any database that you plan on using with your project.
Finally, review your settings and click on Create to start the generation.
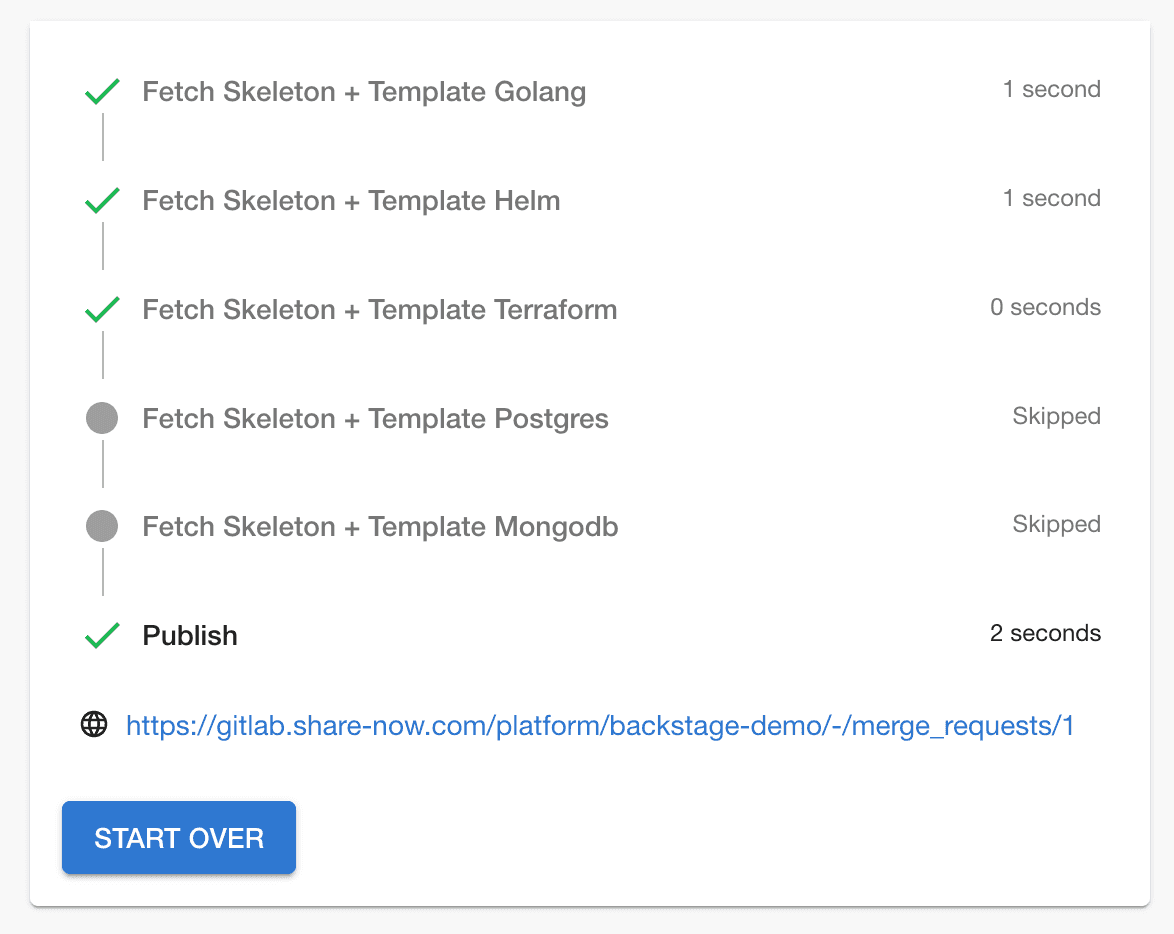
After a successful setup, you will retrieve the link to the Gitlab Merge Request containing the boilerplate that has just been generated. Follow the link to the Merge Request in your Gitlab Project.
Review Generated Code
The Merge Request description will contain useful follow-up steps that should be considered. Read through it to learn more about the next steps.
Next to the generated Go boilerplate code, the Backstage Software Template makes use of the following platform building blocks:
Infrastructure Modules
The tf/ directory contains our infrastructure modules. We use Terraform and
Terragrunt to manage our infrastructure as code.
The directory contains subdirectories for every stage (e.g. dev, int, prod) which host the infrastructure for the
respective stages.
A list of our infrastructure self-service modules can be found in the Terraform section of our platform documentation.
Platform Base Chart
The k8s/ directory contains the deployment configuration for our application, utilizing the
Platform Base Helm Chart.
To learn more about the vast configuration options, check out the Platform Base Chart documentation,
which also contains extensive examples.
Dockerfile
Each repository should contain a Dockerfile, which describes how to build a runnable container image of our
application. A multi-stage docker build ensures the application
is portable and can be build and deployed everywhere (e.g. your local machine and in production).
Platform Auto-Devops Pipeline
The .gitlab-ci.yml file uses our Platform Auto-Devops Pipeline
to build, scan, test & deploy our application.
To learn more about the configuration options and additional features, take a look at our
Platform Auto-Devops Pipeline documentation.
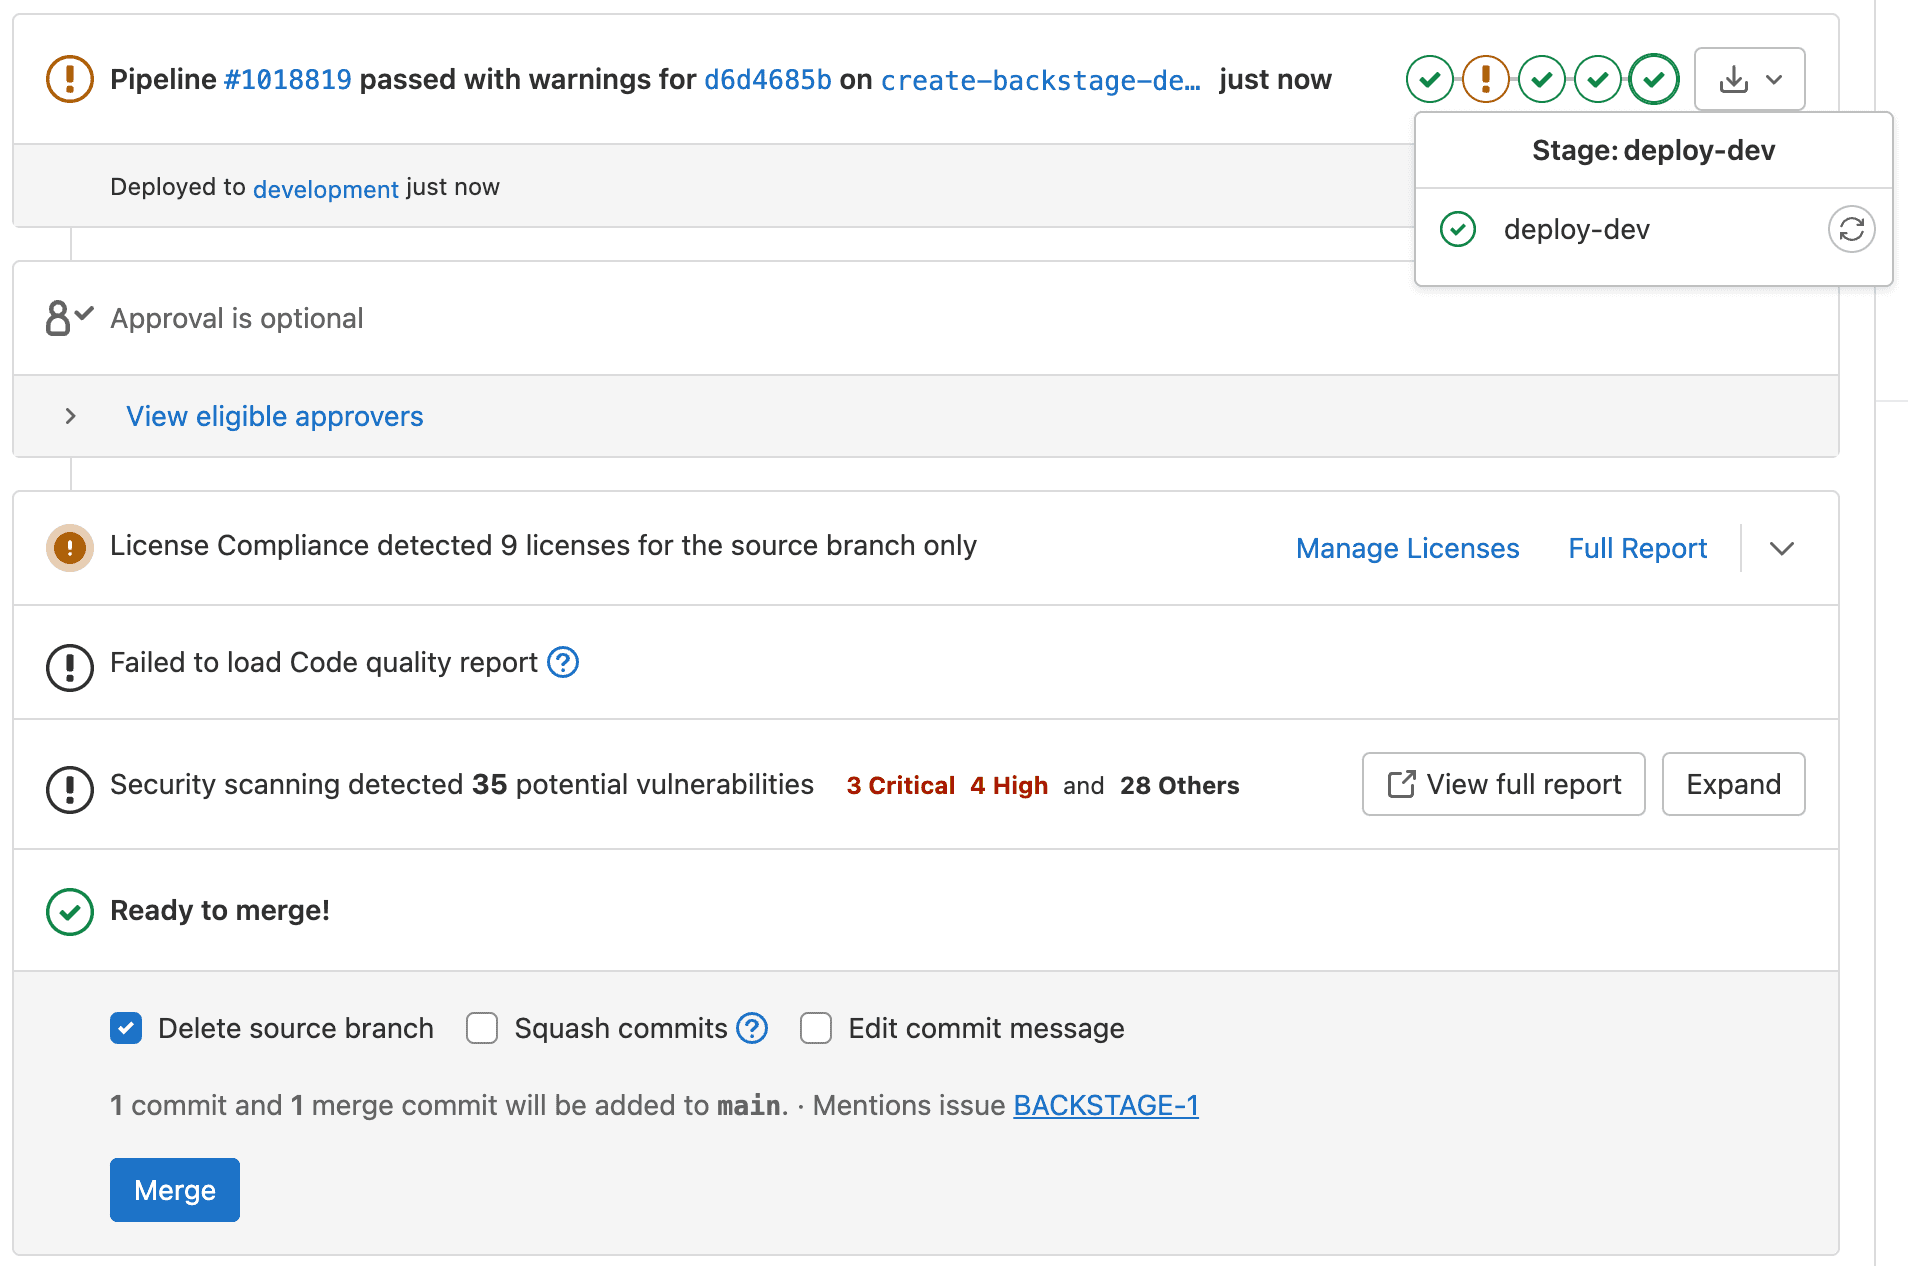
Our Application in Action
As soon as the Merge Request Pipeline has finished, we can reach our application. By default, the software template configures the base-chart to expose our application in the private network, reachable inside our VPN. The Merge Request description should contain the URL where the application has been exposed.
You should be able to send a request against this URL, or open it in your browser and retrieve the following response:
{"hello":"world"}
You should also be able to see the deployment in the Kubernetes cluster of your domain:
❯ boost auth --domain <DOMAIN> --stage <STAGE>❯ kubectl get deployNAME READY UP-TO-DATE AVAILABLE AGEbackstage-demo 1/1 1 1 26m
Awesome, you just deployed your first application on our platform!